Have you ever wondered how construction equipment moves so smoothly? Or how factory machines work with such precision? The secret lies in hydraulic flow control valves. These small but mighty components control how fast hydraulic fluid moves through your system.
If you're working with hydraulic equipment, knowing how to adjust these valves properly can save you time, money, and headaches. Let's dive into everything you need to know about hydraulic flow control valve adjustment.
What Is a Hydraulic Flow Control Valve?
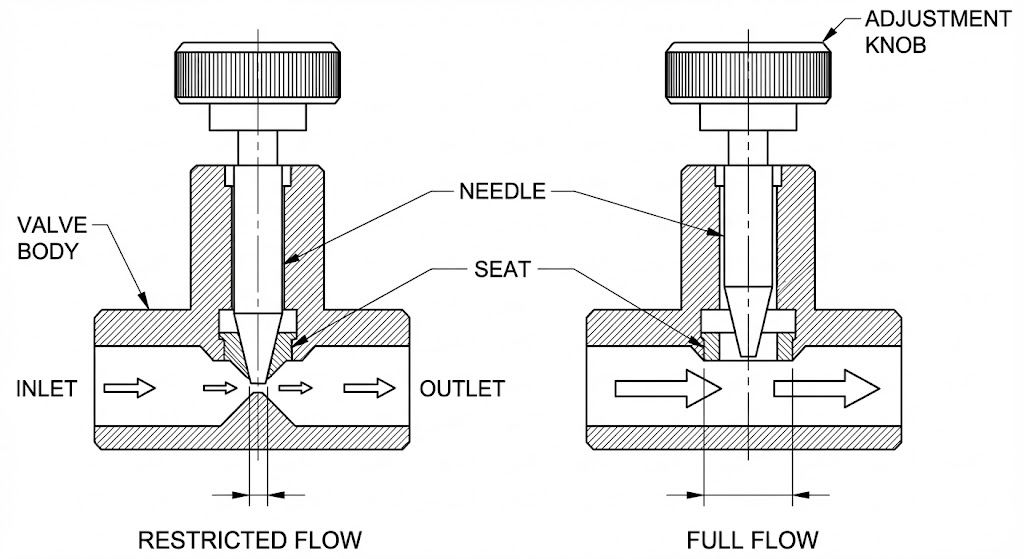
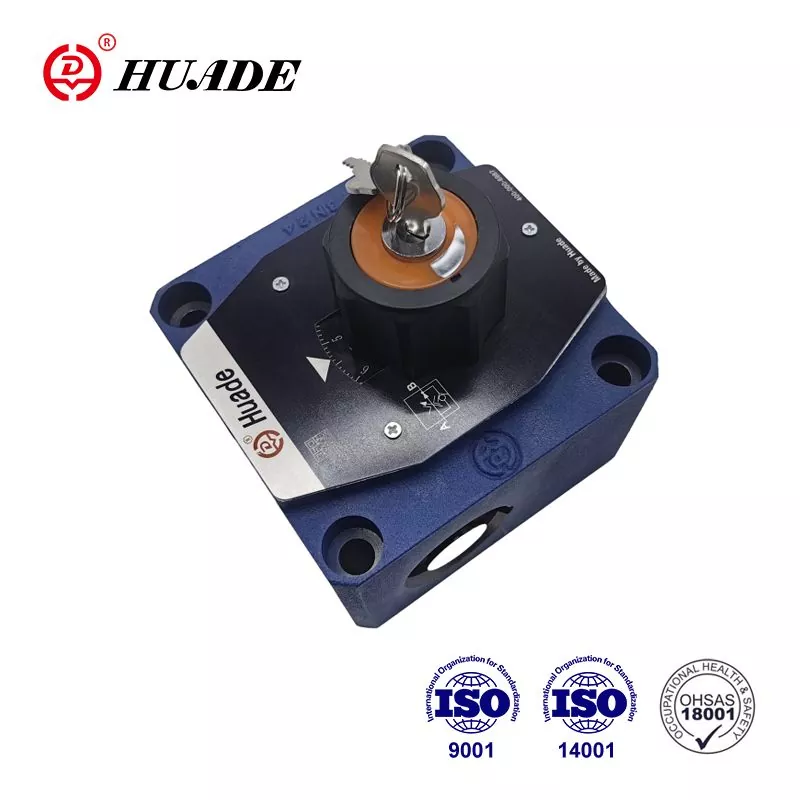
A hydraulic flow control valve is like a faucet for hydraulic fluid. Just as you turn a faucet handle to control water flow, these valves control how much hydraulic fluid flows through your system.
Here's how it works:
The valve has an adjustable opening (called an orifice)
When you make the opening smaller, less fluid flows through
When you make it larger, more fluid flows through
This controls how fast your hydraulic cylinders or motors move
Think of it like adjusting the speed on a garden hose nozzle. Squeeze it tight, and water comes out slowly. Open it wide, and water flows fast.
Types of Hydraulic Flow Control Valves
Not all flow control valves are the same. Here are the main types you'll encounter:
1. Non-Compensated Flow Control Valves
These are the simplest and most affordable options:
Fixed Orifice Valves:
These can't be adjusted. The flow rate is set when manufactured. They work well when your system pressure stays the same.
Adjustable Orifice Valves:
You can adjust these by turning a screw or knob. However, the flow changes when system pressure changes.
Needle Valves:
These give you very precise control. They use a tapered pin that you can adjust to fine-tune the flow. Turn clockwise to reduce flow, counterclockwise to increase it.
2. Pressure-Compensated Flow Control Valves
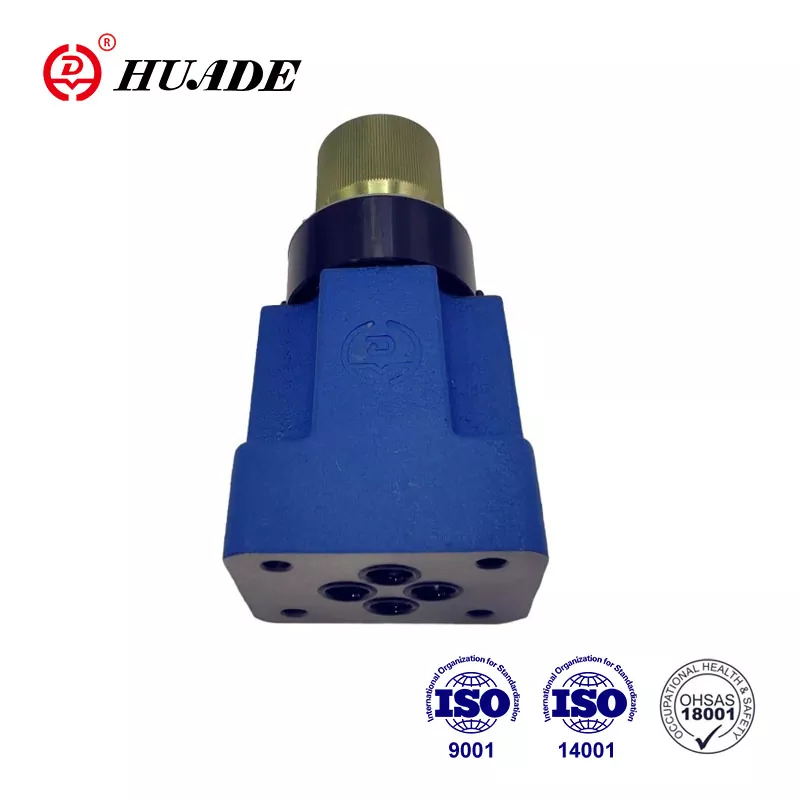
These smart valves automatically adjust for pressure changes. Even if your system pressure goes up or down, the flow rate stays the same. They're more expensive but give you consistent performance.
3. Temperature-Compensated Flow Control Valves
These advanced valves adjust for both pressure AND temperature changes. When hydraulic fluid gets hot, it flows differently. These valves compensate for that change automatically.
Why Proper Adjustment Matters
Getting your flow control valve adjustment right is crucial for several reasons:
Better Performance: Your equipment moves smoothly without jerky motions
Energy Savings: You don't waste hydraulic fluid or energy
Longer Equipment Life: Proper flow prevents overheating and excessive wear
Increased Productivity: Optimized cycle times mean more work gets done
Never attempt to adjust a hydraulic valve without following these safety steps:
Wear protective equipment: Safety glasses, gloves, and hearing protection
Shut down the system: Turn off the pump and wait for it to stop completely
Release pressure: Open drain valves to let out any stored pressure
Lock out the system: Use lockout/tagout procedures to prevent accidental startup
Secure heavy loads: Make sure nothing can fall or move unexpectedly
Warning: Hydraulic fluid under pressure can cause serious injury. A tiny leak can inject fluid into your skin, causing severe damage. Always use cardboard or wood to check for leaks, never your hands.
Tools You'll Need
Before starting, gather these essential tools:
Wrenches and screwdrivers (sizes depend on your valve)
Pressure gauge to monitor system pressure
Flow meter to measure flow rate accurately
Clean rags (lint-free)
Valve adjustment kit (if required by manufacturer)
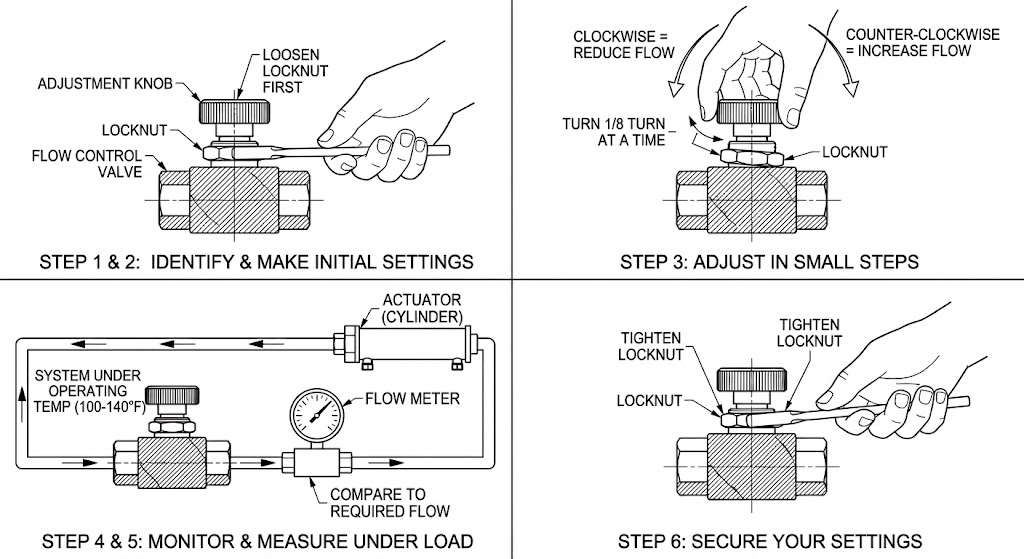
Step-by-Step Adjustment Process
Step 1: Identify Your Valve Type
Look at your valve and find the adjustment mechanism:
Manual valves: Look for a knob, screw, or lever
Electronic valves: These connect to control panels or computers
Spool valves: These may have a locknut you need to loosen first
Step 2: Make Initial Settings
Start with the valve in a known position:
If it's a new installation, start with the valve about halfway open
If you're fine-tuning, note the current position before making changes
Always turn the adjustment slowly
Step 3: Adjust in Small Steps
This is the most important part:
Turn the adjustment only 1/8 turn at a time
Wait a few seconds between adjustments
Clockwise turns reduce flow
Counterclockwise turns increase flow
Step 4: Test Under Real Conditions
Don't adjust the valve when the system is empty or cold:
Run the system until it reaches normal operating temperature (100-140°F)
Apply typical loads to your equipment
Watch how the actuators (cylinders or motors) move
Step 5: Monitor and Measure
Use your flow meter to check the actual flow rate:
Compare it to what you need for your application
Make small adjustments as needed
Don't rush this process
Step 6: Secure Your Settings
Once you're happy with the adjustment:
Tighten any locknuts to prevent the setting from changing
Mark the position for future reference
Document the settings in your maintenance records
Common Problems and Solutions
Problem: Equipment Moves Too Slowly
Possible causes:
Flow rate set too low
Clogged valve or filter
Internal leaks in the system
Solutions:
Increase flow by turning counterclockwise
Check and replace filters
Inspect seals and gaskets
Problem: Jerky or Uneven Movement
Possible causes:
Air in the hydraulic lines
Flow rate too low
Contaminated fluid
Solutions:
Bleed air from the system
Slightly increase flow rate
Change hydraulic fluid and filters
Problem: System Overheating
Possible causes:
Flow rate too high
Valve adjusted too tight
Wrong fluid viscosity
Solutions:
Reduce flow rate
Check fluid specifications
Ensure proper cooling
Problem: Inconsistent Performance
Possible causes:
Non-compensated valve with varying pressure
Worn valve components
Temperature changes affecting fluid
Solutions:
Consider upgrading to pressure-compensated valve
Replace worn parts
Use temperature-stable hydraulic fluid
Best Practices for Long-Term Success
Regular Maintenance
Check valve settings monthly
Replace hydraulic filters every 3-6 months
Monitor fluid temperature and contamination levels
Proportional electronic valves offer computer control
Flow regulators provide the tightest control
Conclusion
Adjusting hydraulic flow control valves isn't rocket science, but it does require patience, the right tools, and attention to safety. Remember these key points:
Safety always comes first - depressurize and lock out the system
Make small adjustments - 1/8 turn at a time
Test under real conditions - proper temperature and load
Use the right valve type for your application
Document everything for future reference
With proper adjustment and maintenance, your hydraulic flow control valves will provide years of reliable service. Take your time, follow the steps, and don't hesitate to consult professionals when needed.
Whether you're working on construction equipment, manufacturing machinery, or any other hydraulic system, understanding flow control valve adjustment will make you more effective and help keep your equipment running smoothly.
Remember: a well-adjusted hydraulic system is a productive, efficient, and safe hydraulic system.
We use cookies to offer you a better browsing experience, analyze site traffic and personalize content. By using this site, you agree to our use of cookies.
Privacy Policy